Hand-Pump & Siphon Greywater System
A great system for obtaining greywater from an existing interior bathtub or shower (against an exterior wall) with no access to the drains below the floor…
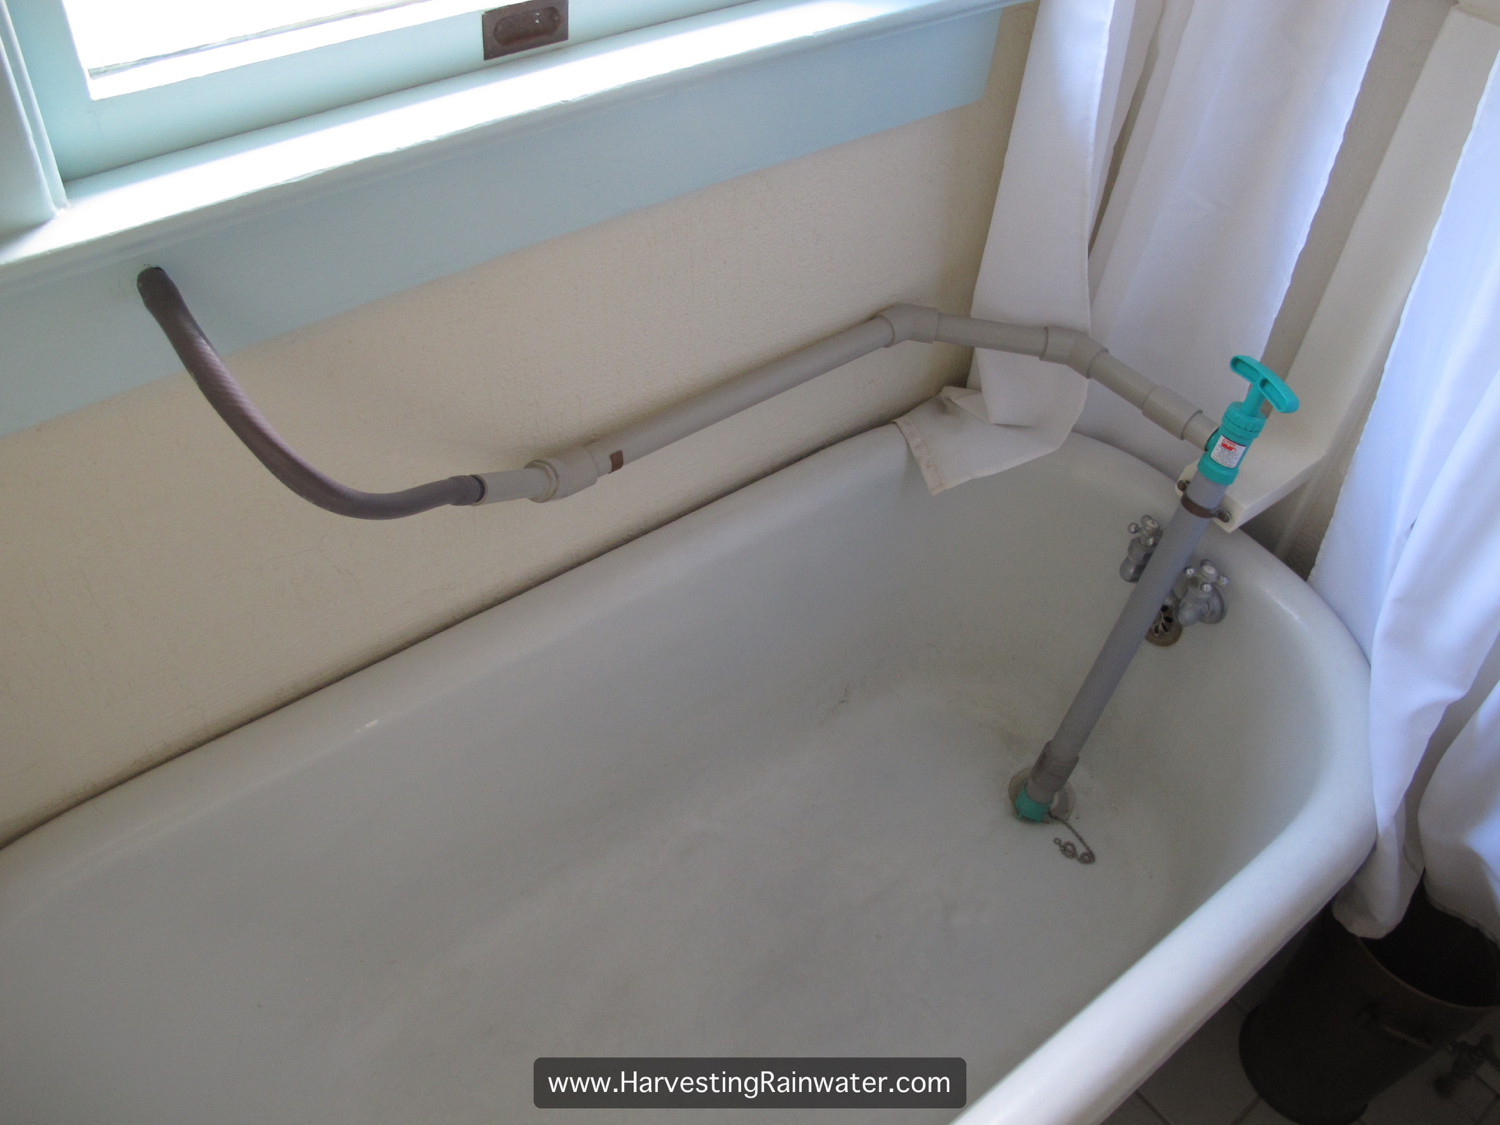
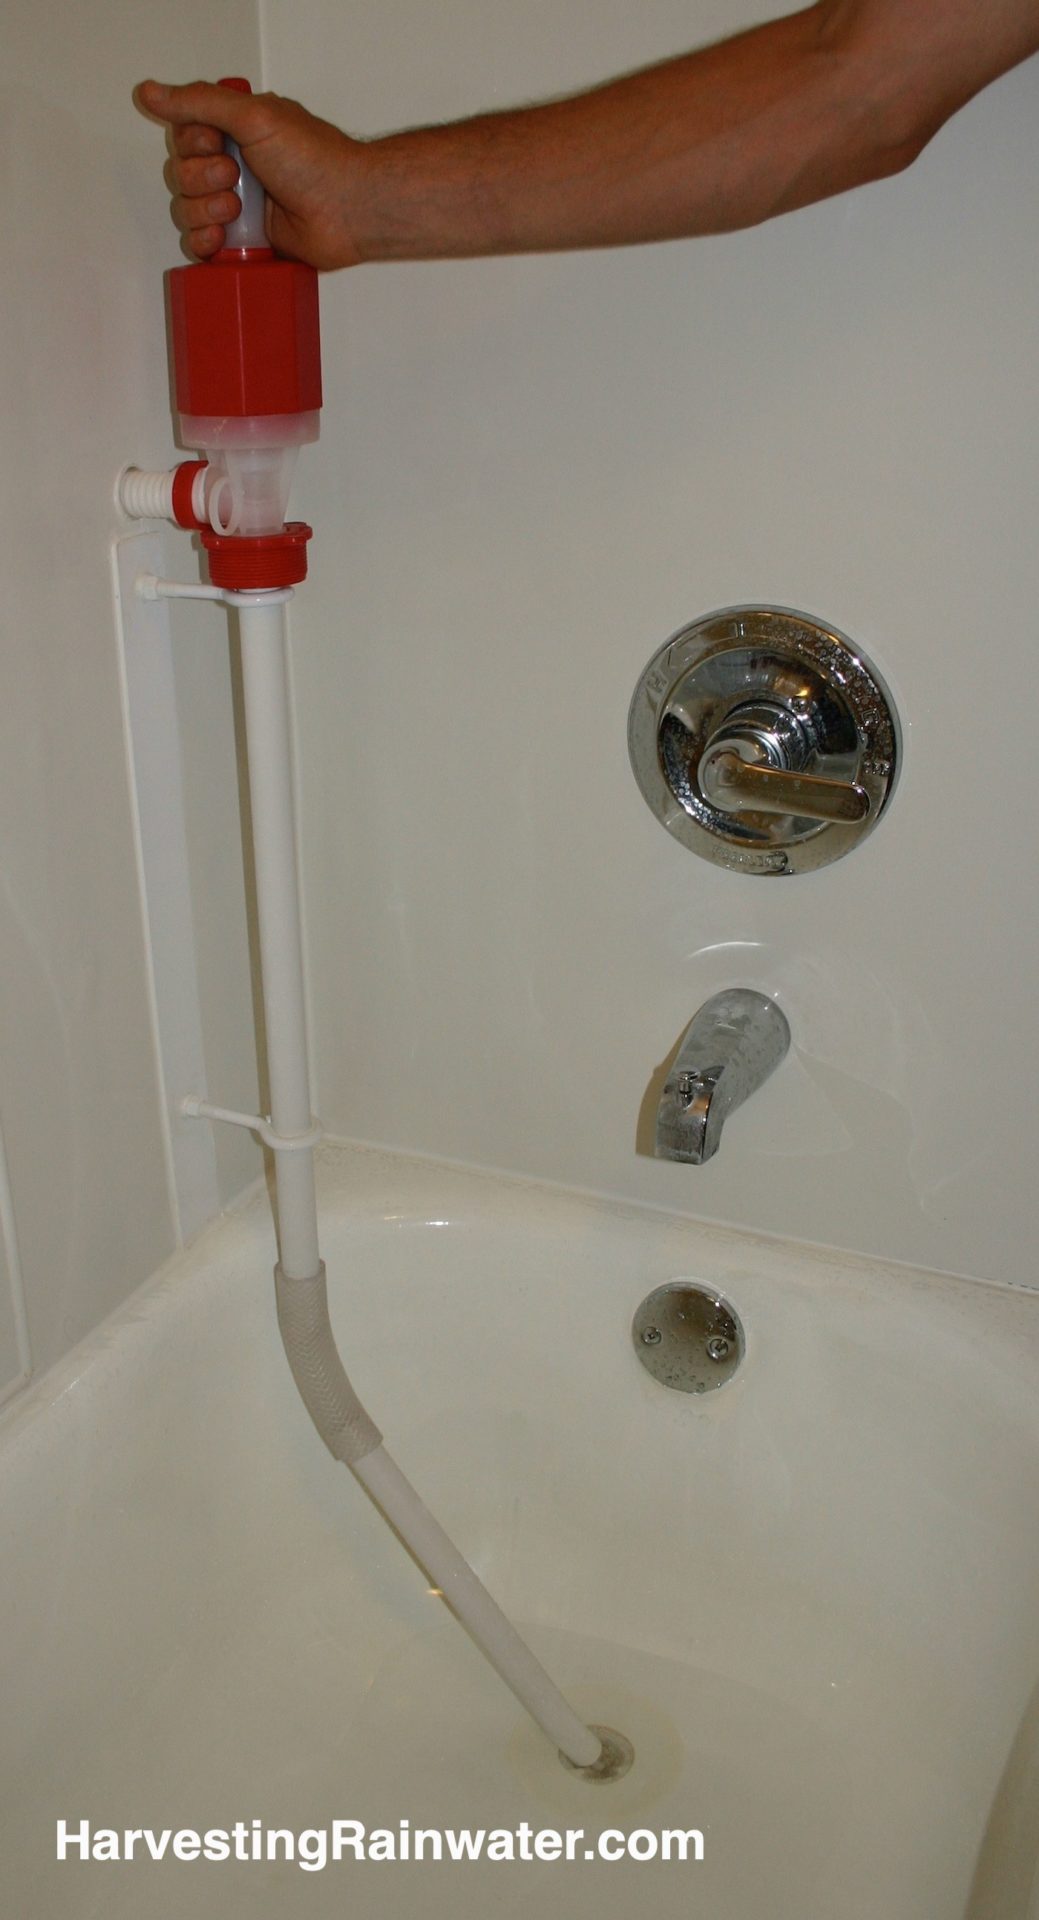
You pump the hand pump a few times, the siphon effect kicks in, and the greywater drains out to the landscape (fig. 1). (Note: The area to which you are directing greywater must be lower than the intake point of the hand pump for the siphon effect to work).
This page is meant as a supplement to the greywater chapter in my book, Rainwater Harvesting for Drylands and Beyond, Volume 2, 2nd Edition. So read that before you install your system.
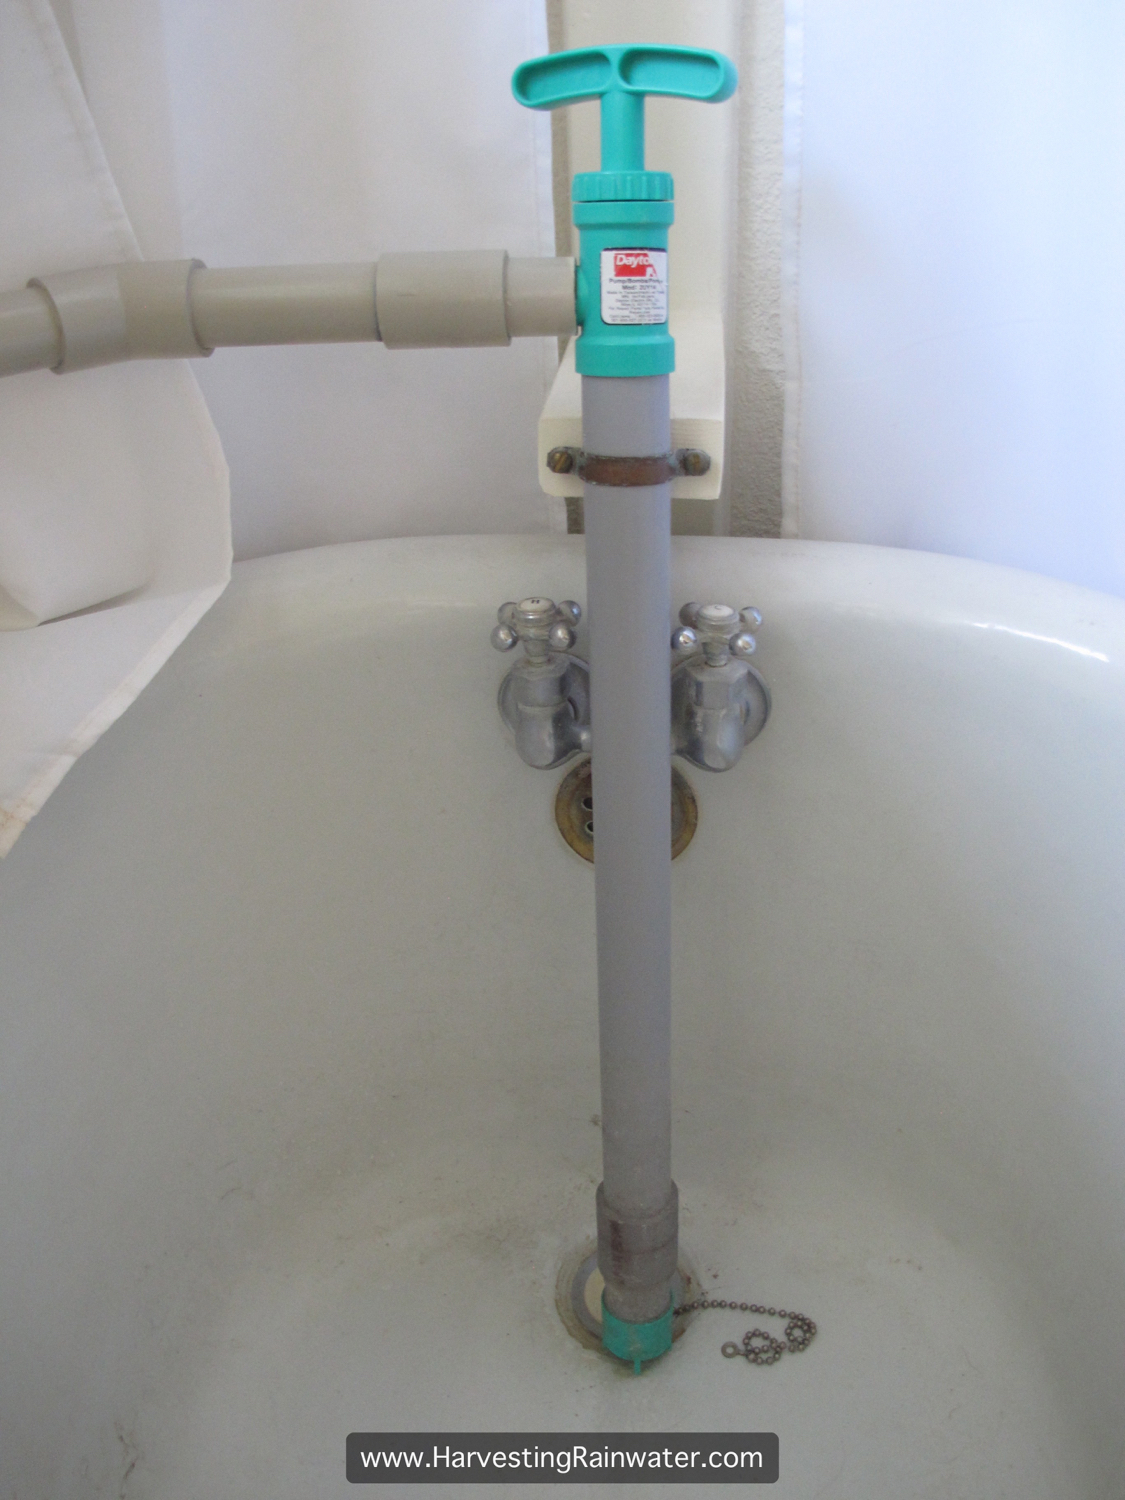
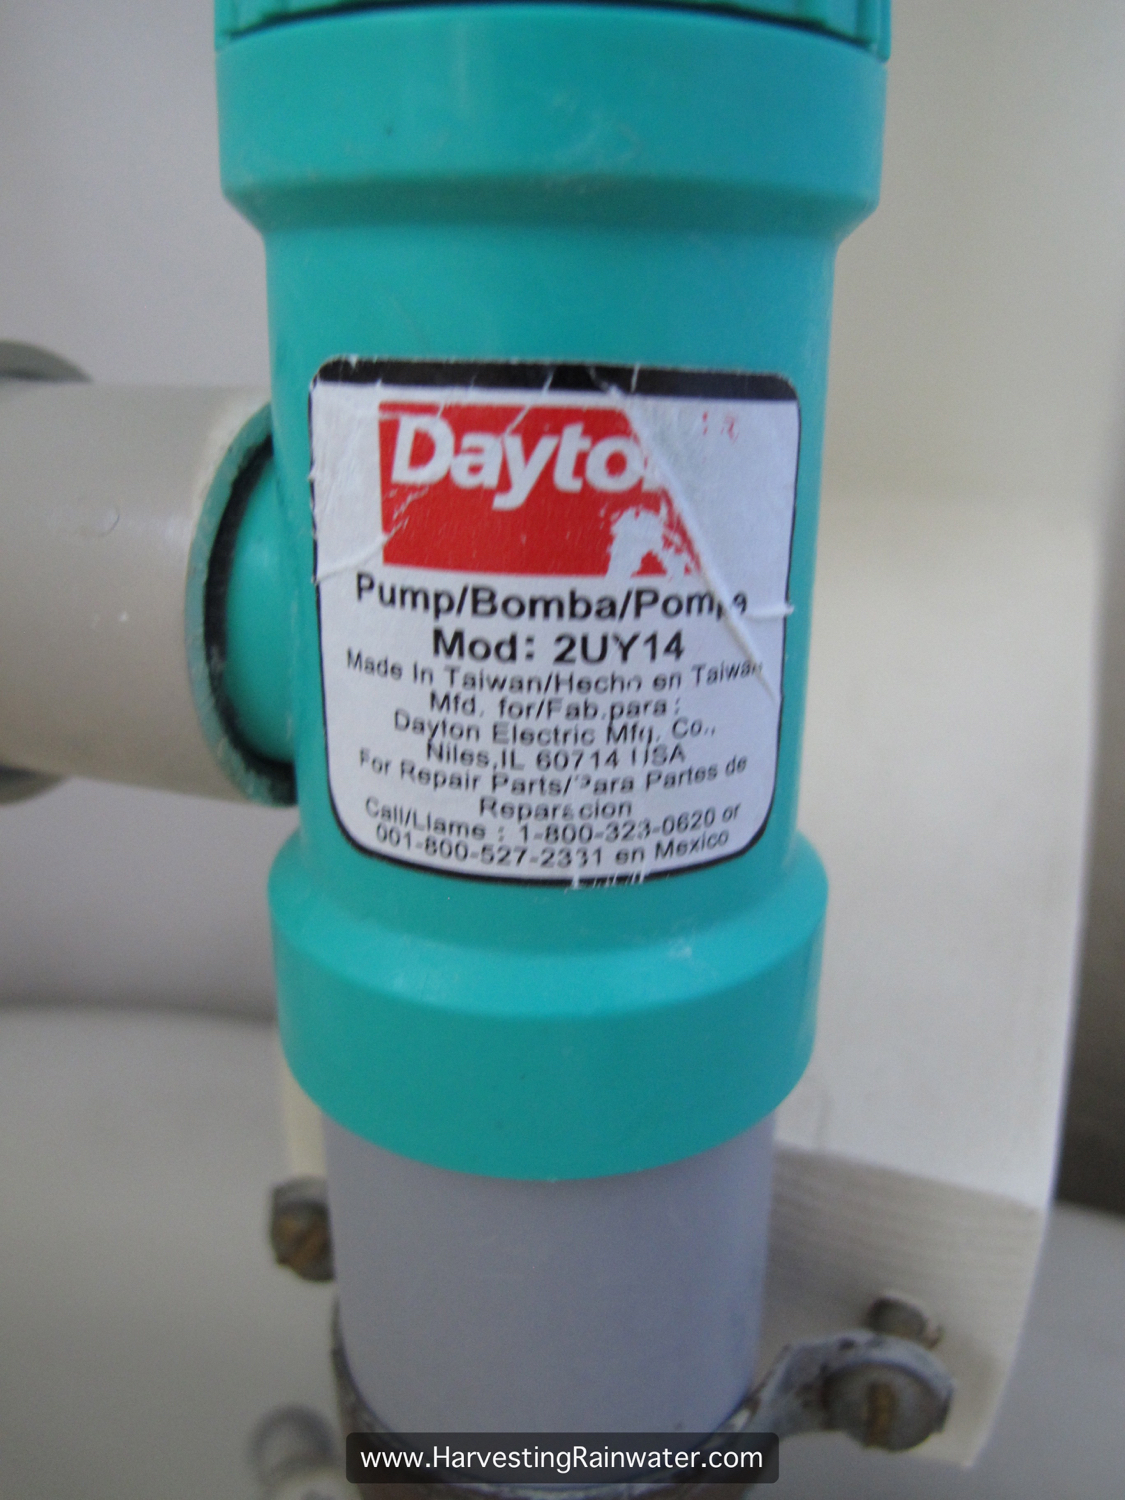
My neighbor Moses Thompson set up a really nice system in his and his wife Kelly’s home, a system which is an evolution of the one I feature below this one. A big improvement is Moses’ use of a higher-end, higher-volume hand pump—a Dayton Hand Drum Pump, model 2UY14—rated for liquid temperatures up to 140º F (60º C), so hot greywater from a bath is no problem (figs. 2 and 3). (The first hand pump Moses used was not rated for hot water and failed.) The high-volume capacity of the Dayton pump drains the tub/shower in just 5 minutes. The pump is readily available online, with a current price (summer 2015) of about $80.
[Note: We were contacted by the folks at Action Pump Co in Illinois in regards to their U.S.-made model Action Pump 5000 Siphon Pump Light Oil-Kerosene-Water Based Chemicals #5000 manual siphon pump which is also rated to 140ºF, currently for about $30. This could well be a comparable alternative to the Dayton, although we haven’t tested it. If you decide to try out Action Pump’s model, we’d love to hear how it performs!]
Moses and Kelly just use a regular tub drain plug to plug the tub when bathing, then drain the tub with the pump.
Moses wisely avoided 90º bends in his pipe run, instead using 45º bends to get better flow. All was hard-plumbed with 1-inch PVC and then stepped down with a barbed fitting to connect to a conventional 5/8-inch (15-mm) diameter garden hose (fig. 1).
However, based on their experience using the system, Moses thought that a higher-quality, higher-volume (3/4-inch (20-mm)) garden hose would be better, because the cheaper, smaller-diameter hose kinked frequently. You can tell right away when you start pumping if the hose is kinked, as the flow stops and you have to go outside and unkink it.
All garden hoses kink, though, so to avoid kinks altogether use spa-flex PVC hose. You can get it in 1-inch (25-mm) diameter, and just about any color you like. Or to avoid kinks you can run the garden hose or spa-flex hose down the outside of the exterior wall, and once you hit ground level, transition the hose into a rigid-plastic-piped branched drain—just make sure the end of the hose is below the elevation of the pump inlet, so the siphon will work. (See Rainwater Harvesting for Drylands and Beyond, Volume 2, 2nd Edition, chapter 12, for more on branched drain systems.) If you do use only garden hose (no pipe), keep in mind that the longer the hose, the farther you can move the water, but when watering plants close to the greywater source, you have to roll up more hose without letting it kink.
In 10 years of use, the hose has never clogged. While Moses has very short hair, Kelly’s hair is long.
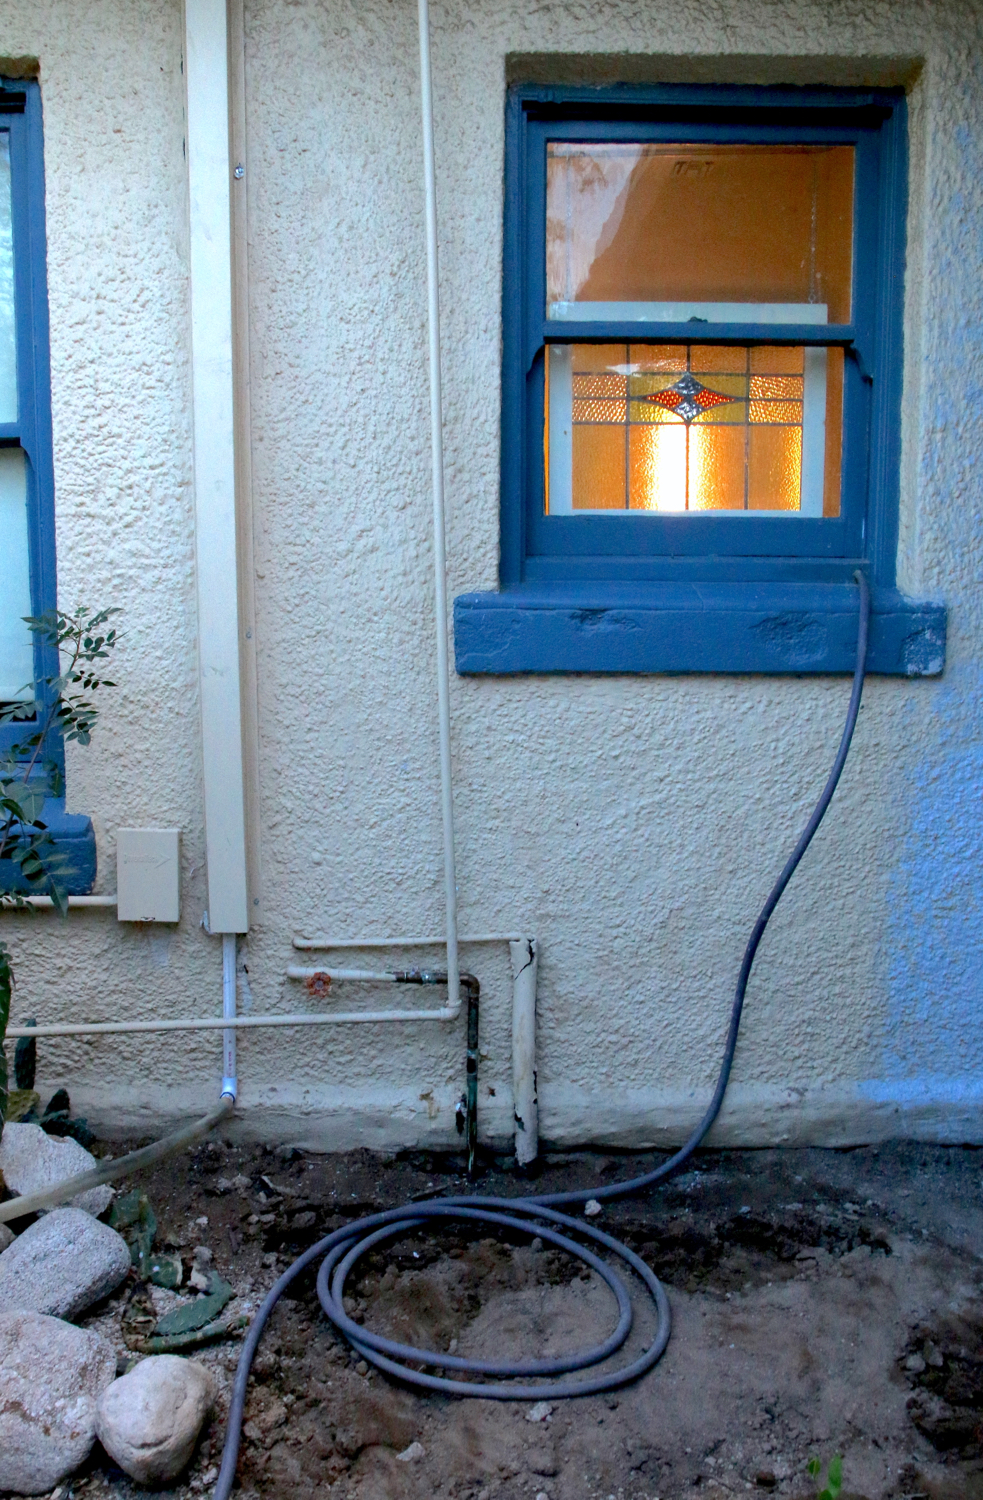
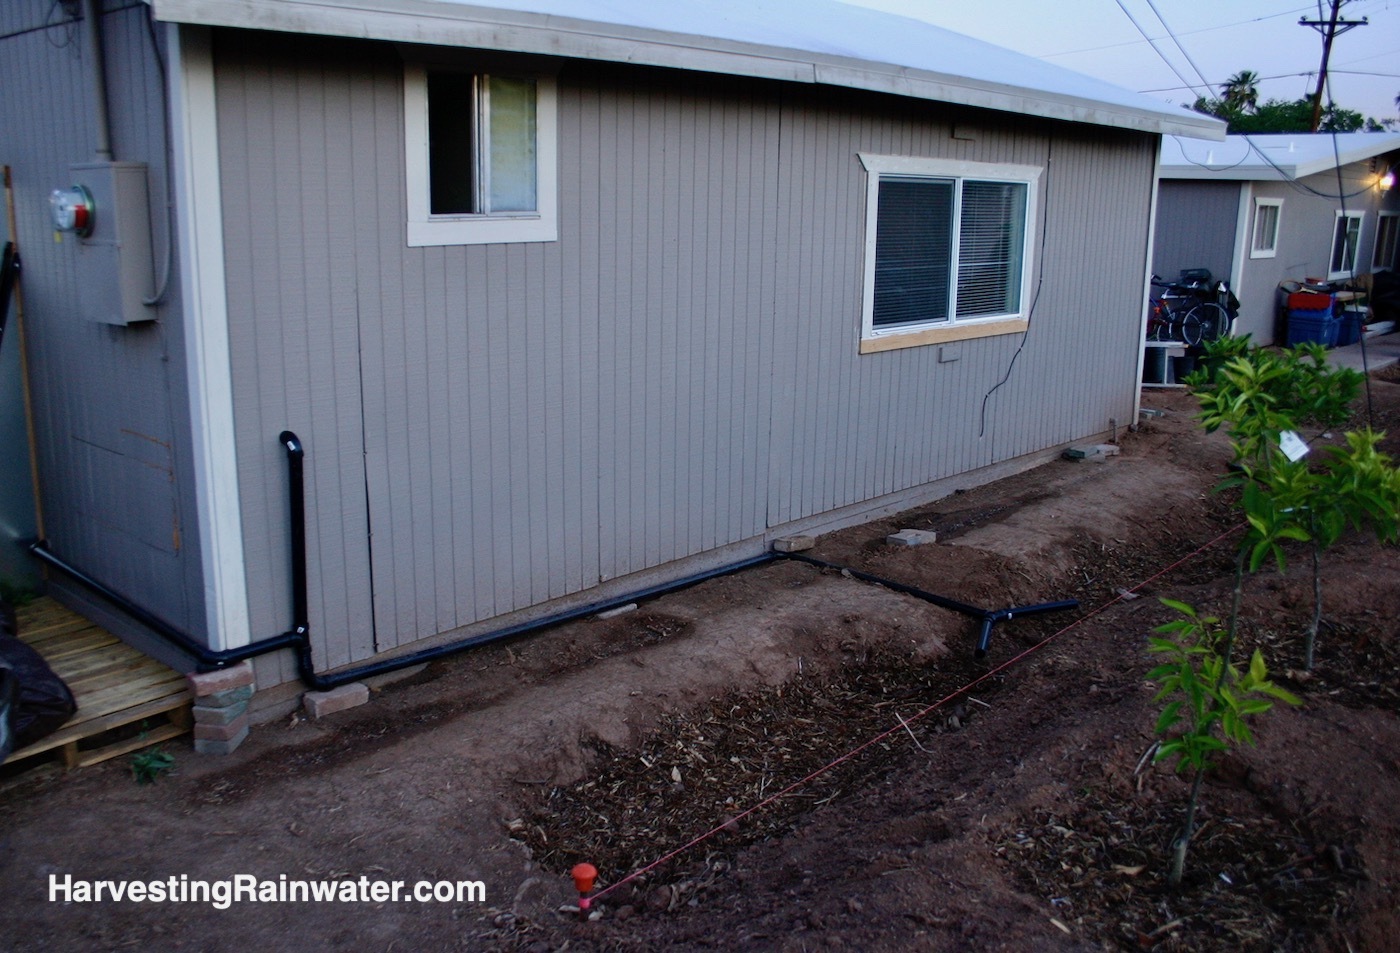
Each day, Moses moves the hose to a different plant in the yard (he rotates between four different zones) (fig. 4), though he also has the option of leaving the hose in place for a number of days when establishing a new plant. Regularly moving the hose distributes the greywater to multiple points and helps ensure the soil stays healthy, aerobic (oxygen rich), and odor-free. Whereas if all the greywater were always sent to the same spot, the soil could have become saturated, anaerobic (lacking oxygen), and stinky. Thus this is a good system for people that like to interact with their plants and water system. But if you are more of a hands-off person, you might be better off directing the siphoned water into a branched-drain system, which distributes the greywater to multiple plants without your needing to move any pipe or hose.
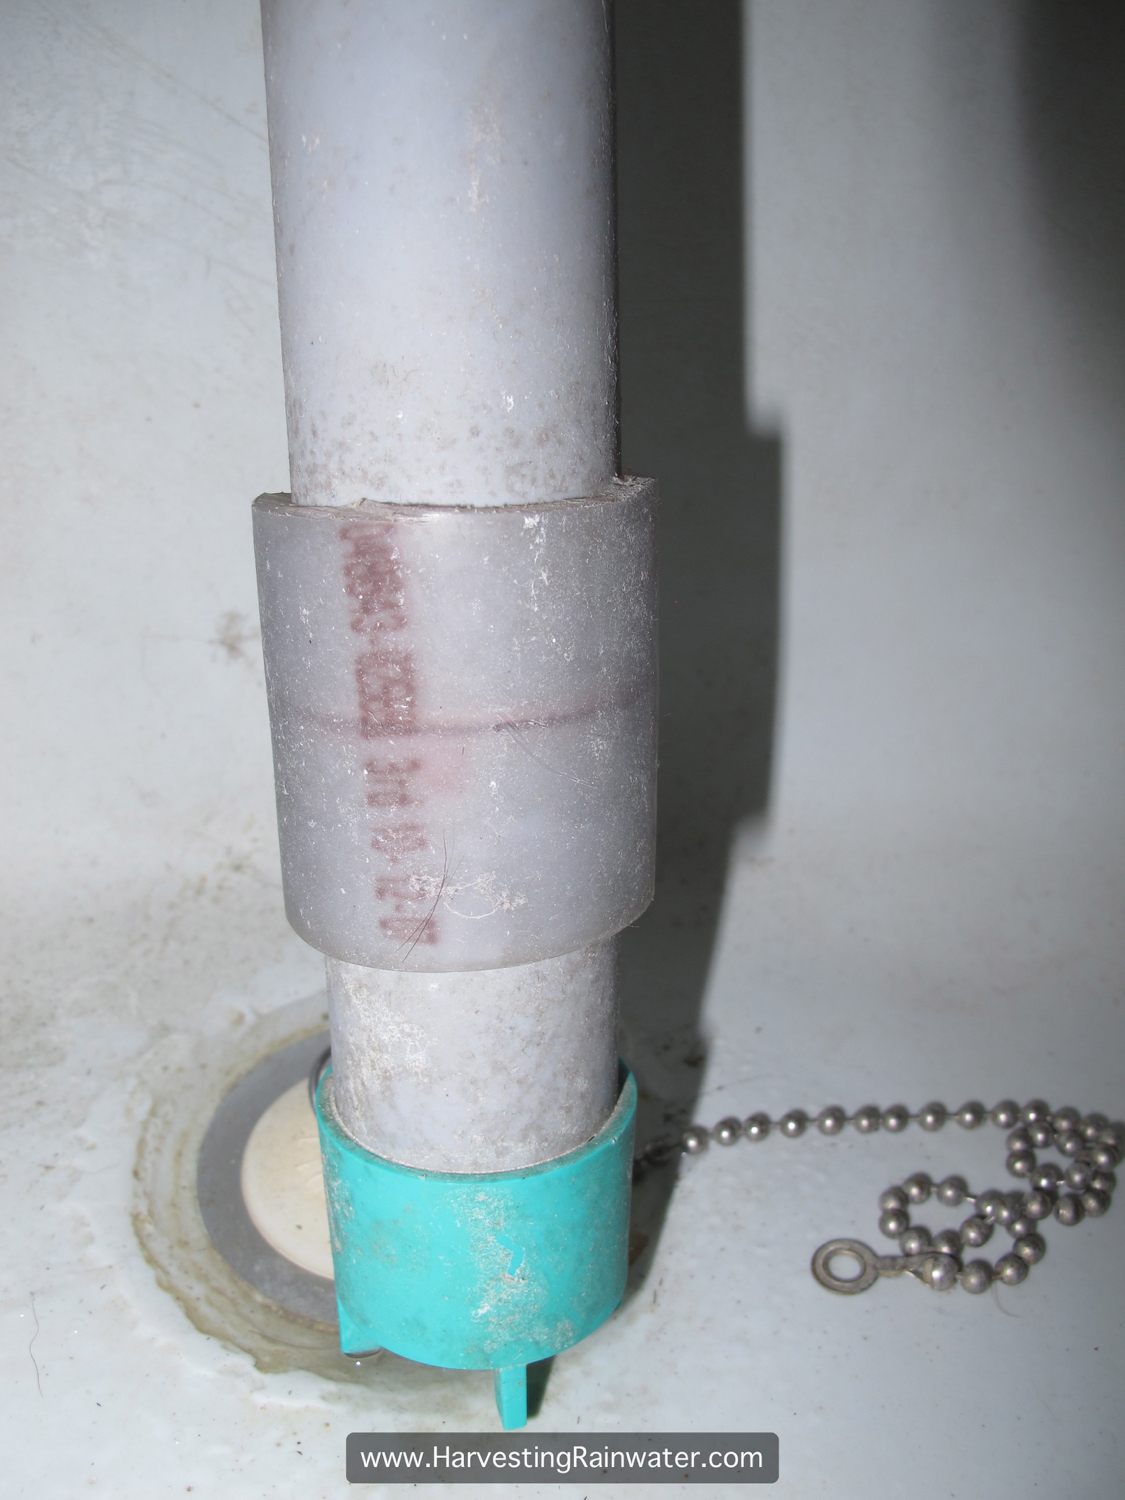
To make the system more convenient and joyous to use, Moses shortened the down tube near the inlet, so the pump hits water with the plunger in just one or two pumps (see fig. 5). Once that occurs, he pumps about six more times and a good flow of water siphons out on its own. More pumping was required pre-retrofit.
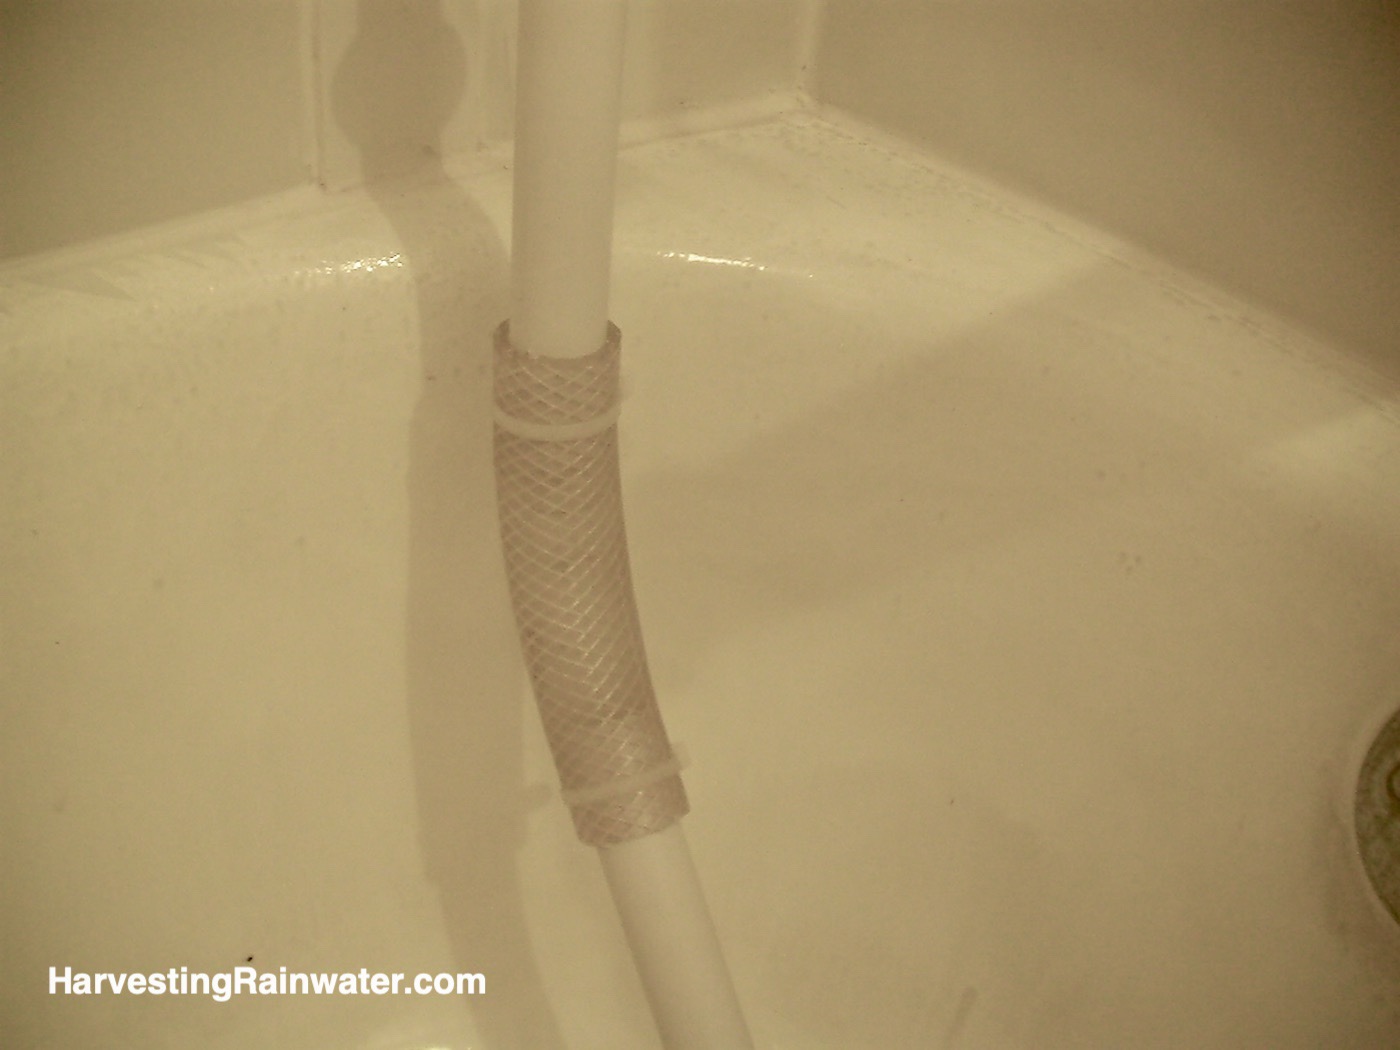
After Moses shortened the pump’s down tube by cutting out a section of its length, he used vinyl tubing as a coupling to reconnect the shortened tube to its inlet, because the shaft is not a standard PVC-pipe size (fig. 5). The vinyl is a little elastic so he was able to slide it over both ends for a good seal. If a tighter seal were needed, stainless steel hose clamps could be used around the vinyl tube.
The pump outlet (which goes off to the side, up near the handle) is also not a standard size, so vinyl tubing could be used there, too, to transition to PVC pipe. But what Moses did instead was to use a 1-inch by 1-inch (25-mm by 25-mm) PVC slip-coupling, with the pump outlet glued inside a short section of 1-inch (25-mm) PVC pipe. It wasn’t a perfect fit so he used a few extra coats of PVC cement. Though one advantage of connecting to the pump outlet with rigid pipe bracketed to the wall would be that the pipe would help hold the pump more steadily in place.
When asked to sum up 10 years of using the system, Moses reported, “It has worked so well we never installed a branched-drain system with three-way valve in the crawlspace under the bathroom floor, which had been my initial intention. The hand pump was intended to be an interim solution, and it just stuck.”
And as to whether or not he’d recommend it to others, he responded, “I’d recommend it to someone who has a little building/plumbing experience, someone who enjoys trial-and-error tinkering. It’s definitely a site-specific custom build, not an out-of-the-box kit.”
Another version of an interior siphon, hand-pump-powered greywater drain
This is from the first edition of “Rainwater Harvesting for Drylands and Beyond, Volume 2”
This system (along with Moses’ example above) is my favorite system for obtaining greywater access from an existing interior bathtub or shower that is located against an exterior wall. It is slightly more complex than the siphon-tube greywater drain, but far more convenient, because the pump is located inside the bathroom where you and the greywater are (figs. 6A, B). You pump the hand pump a few times, the siphon effect kicks in, and all the water from a five-minute shower can be drained out to the landscape in about ten minutes. It was designed by Christian Nys and Jay Johnson of the Pierson Street Ecohood in Phoenix, Arizona.
Materials
To get ready to construct an interior-siphon, hand-pump-powered greywater drain, first obtain a siphon hand pump that is hot water compatible, and made to attach to—and drain—a 55-gallon (208 liter) drum. These pumps are available from Grainger (www.grainger.com) and other on-line outlets.
In addition, obtain about 1 foot (30 cm) of braided vinyl tubing. The interior diameter of the vinyl tubing should be the same as the exterior diameter of the pump’s rigid pipe (usually one inch or 25 mm).
Also get a rubber drain screen with depressed cup, white silicone caulk, some 1.5-inch (40-mm)-diameter rigid ABS plastic drainpipe, about a foot (30 cm) length of schedule-20 PVC pipe with an interior diameter of 1 3/16-inch (30-mm), two 6-inch-long (150 mm) 3/8-inch (10 mm)-diameter eye-bolts, a toggle nut, hex nut, and lock washer to thread onto each eye-bolt, and a 2-inch (5-cm)-wide steel plate (see installation notes to determine its length). All these materials are available at the hardware store (except perhaps the steel plate, which is available from metal shops), and are described in more detail below.
Installation
Begin by setting the hand pump upright inside the tub or shower on the inside of an exterior wall. Lift the pump to an elevation where the bottom of the rigid plastic intake pipe can reach the bottom of the tub at the drain level. Cut the rigid plastic intake pipe at about the top edge of the bathtub. Next attach a section of braided vinyl tubing about 6 inches (15 cm) long to the two cut edges to create a flexible bend in the rigid intake pipe. This will allow you to place the pipe’s inlet right at the tub’s drain—the lowest point of the tub.
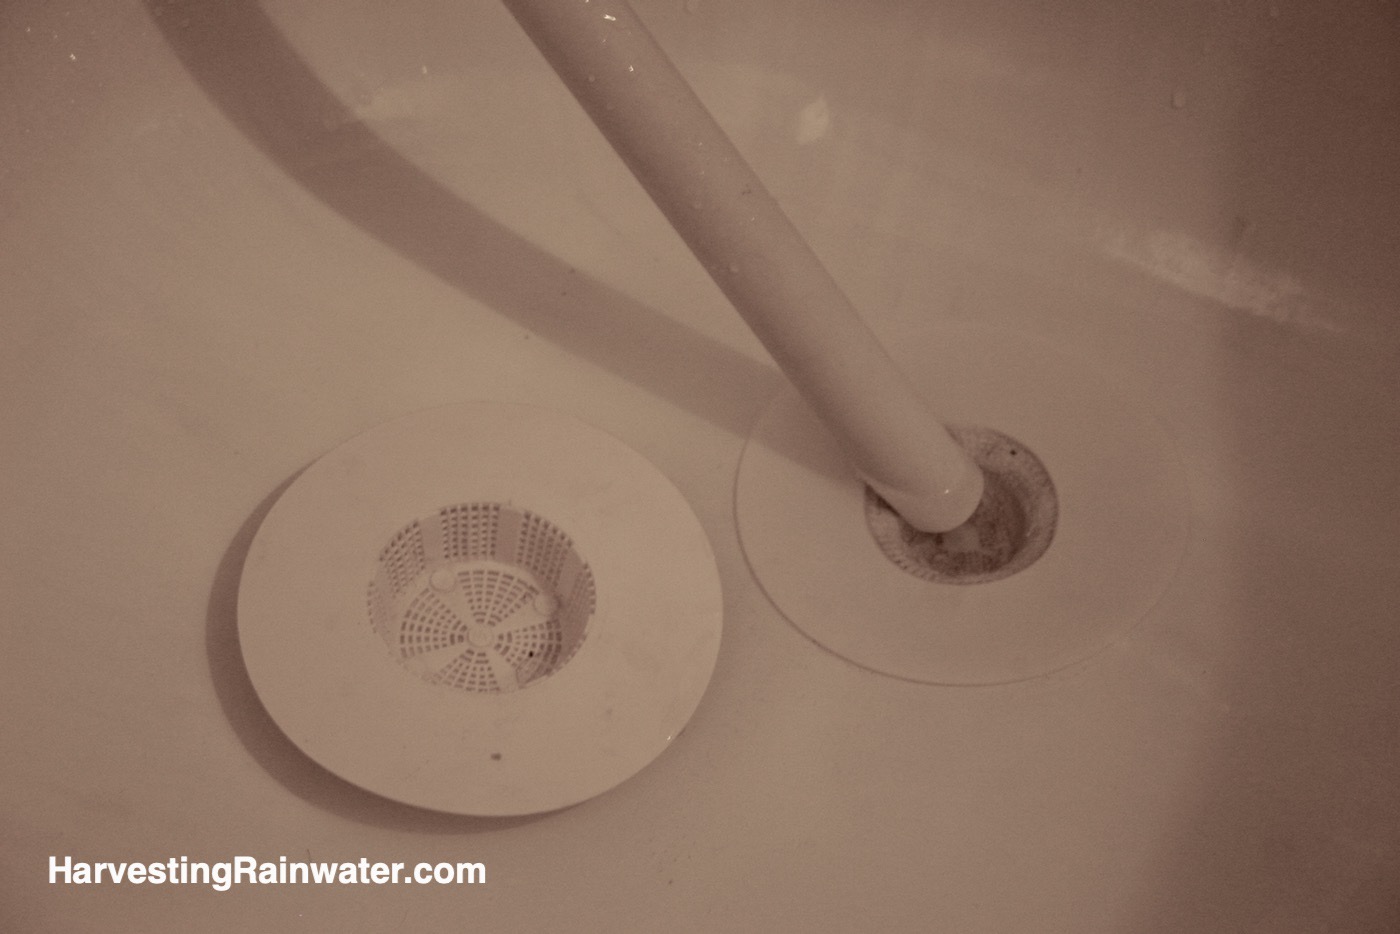
Acquire a rubber drain screen that has a depressed cup designed to catch hair but allow water to pass through. Adapt this drain screen for use as the intake point for the pump pipe by sealing the screen holes with white silicone caulk (fig. 7). Smear the caulking smooth and evenly with your finger on both sides of the screen holes. Now when the adapted drain screen is placed on the bathtub drain it prevents the tub from draining and creates a small, low depression—the lowest point in the bathtub. The tip of the pump’s intake pipe is set at this low point to suction the maximum amount of water from the tub. When you want to direct the tub water to the sewer or septic instead of the landscape, just lift the drain screen and let the water go down the drain.
Again, hold the hand pump up vertically at the desired height against the inside of the exterior wall. Mark a spot on the wall, at the elevation of the hand pump’s outlet tubing, for the hole that will later be drilled through the wall. You will direct the hand pump’s corrugated outlet tubing through this hole to discharge greywater to the outside. Drill the hole from the inside wall through the outside wall using a 1 3/8-inch (35 mm)-diameter ceramic hole saw. Insert a section of schedule-20 PVC pipe with an interior diameter of 1 3/16 inch (30 mm) into this hole to act as a protective sleeve for the pump’s smaller-diameter corrugated outlet tubing. The length of the PVC sleeve should be just a tad longer than the length of the hole through the wall.
Now prepare to attach the siphon pump to the wall using two 3/8-inch (10-mm)-diameter galvanized steel eye-bolts. The rigid intake pipe of the hand pump will be inserted through the eyes of the eye-bolts, so make sure the eye holes are large enough, at least 1-inch (25-mm) diameter to accommodate the intake pipe. The eye-bolts typically need to be at least 6 inches (152 mm) long, depending upon your wall’s thickness, the width of the pump, and/or the thickness of the tub’s edge, since you want the hand pump’s intake pipe to drop inside the tub.
Hold the pump against the wall with its outlet tubing inserted through the sleeved hole in the exterior wall, and its intake pipe positioned correctly in the depression created by the retrofitted tub drain screen. Determine the correct locations for the two eye-bolts by first placing the highest eye-bolt just under the hand pump, so the hand pump base will rest upon the eye-bolt. The lower eye-bolt should be placed a few inches above the upper edge of the tub, maximizing the distance between the two eye-bolts through which the intake pipe is threaded. Use a level to make sure the intake pipe is vertical, and mark the locations for the eye-bolt holes on the wall. You will need to drill the holes about one inch (25 mm) in diameter, through which you can insert toggle nuts screwed onto the threaded ends of the eye-bolts. But before I describe the toggle nuts further, I need to describe the steel plate.
The toggle-nut holes will be considerably larger in diameter than the eye-bolts, so you will need one non-rusting stainless-steel plate or plain steel plate (primed and painted to inhibit rust) to cover the two toggle-nut holes and the space in between. This also greatly strengthens the overall installation. Do not use 2-inch (50-mm)-diameter galvanized fender washers to cover the holes in the wall instead of a steel plate, because the eye-bolts would flex and move too much. The steel plate needs to be at least 2 inches (50 mm) wide with two 3/8-inch (10-mm) eye-bolt holes drilled where you need them. If you are using stainless steel, go to your local metal shop to have them cut and drill the plate to your measurements. You can do your own fabricating if using plain steel.
Once the steel plate is cut and has its eye-bolt holes drilled, attach it to the wall. Screw a hex nut, and then a lock washer, onto each eye-bolt. Then thread each eye-bolt through the steel plate. Next thread a toggle nut on the end of each eye-bolt. You are now ready to fold the toggles, and put them through the two holes in the wall. They will spring open once through the hole, so as you tighten the hex nuts on the tub-side of the wall and steel plate, you will compress everything into a tight, secure fit. The seam around the steel-plate and eye-bolt holes can be caulked to keep water out of the wall if needed. Mount the pump to the wall by threading the intake pipe through the eyebolts so the pump rests atop the uppermost eye-bolt in a vertical position on the wall.
Outside the wall, install 1.5-inch (40-mm) rigid ABS drainpipe to direct the siphoned water to mulched and vegetated basins. A branched-drain layout works well to spread the water out to a number of plantings. The pump’s corrugated outlet tubing must run through the ABS drainpipe and extend to an elevation below where the intake begins inside the house or the siphon effect will not work. The ABS pipe protects the far less durable corrugated tubing from the elements and ensures greywater is directed where you want it without wind, people, or animals inadvertantly redirecting the corrugated tubing.
Troubleshooting
Sometimes the siphon effect can cease after you’ve got it going, requiring more hand pumping to get it going again. Should this happen, there are likely one or two causes and solutions:
- There is an air leak where the vinyl tubing meets the rigid intake pipe, compounded by resistance from the cut edges of the rigid pipe.Remedy: To lessen the resistance, file or sandpaper the inside ends of both sections of rigid pipe, where they join with the vinyl tubing, to a thin wall taper. To seal the air leak, zip tie the vinyl tubing over the rigid pipe (fig. 8). Caulking the seam may also help.
- There is a vortex swirl through the water allowing air into the intake pipe.Remedy: Cut an angle into the intake end of the pipe to get a flatter, closer interface with the drain screen. Then try different micro-adjustments of the intake pipe’s placement within the drain screen as you siphon out the water. Keep the pipe where the vortex is less likely to occur.
For more

Volume 2
See chapter 12 of Rainwater Harvesting for Drylands and Beyond, Volume 2, 2nd Edition